S3014 Build and Review (by Dr. Ralph Okon, AKA PowerCroco)
Scorpion 3014 Brushless Motor Kit building report
(construction reviewed by Dr. Ralph Okon, AKA PowerCroco)

I've got a motor building kit made by ScorpionSystems from Hong Kong.
The foto shows the complete kit as I got it.

All needed parts are in it without glue and magnetwire.
This is okay- everbody prefers another kind of glue (I loctite 638 p.e.)and wants to realise his on winding with the prefered wire thickness.
The magnets I found into the foamy packages. They have N50EH quality- oustanding strength and temperature resistance (upto 200°C) quality!
The different polarity of both types of segment magnets is marked.

The golden eloxated statorholder has a kone between statorholding part and frontplate - very good solution for leading the forces!
And seems, the is more then enogh place for switching the wires in every thinkable type you want (Y,YY, D,DD)

Can bottom and back iron came just connected.
Shaft cames with fine grinded flattenings for good setting for the holding srews.
The hole diameter is burly. there are 2 screws used with the optiaml angle of 90° between them.
The inner surface of backiron is not paited and just prepared for gluing in the magnets.
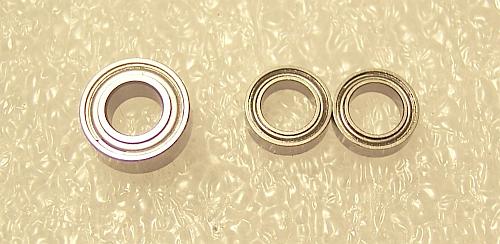
3 bearings are used.
This is not an optimal solution but good to prevent oscillations.
into the statorside there are 2 MR 85 ZZ built in sholder by sholder, into the holding place there is a bigger and stronger MR 105 ZZ used. The bearing seats are burly made too.
If you have, you can use a second MR 105 ZZ on the other side.
Then it has it's seat direct into the statorhole - some manufacturers are using this way to get stronger bearings in their motors and reduce the additional frictions caused by a 3 bearing system.

Stator has a modern, ironrich shape and very thin 0,2mm plates.
the "G2" shape was designed using the minicroco from MARTIN GOETZENBERGER as source - imho one of the best, you can get. Compared to "G1"shape it has much broader hammerstalks and stronger heads.
the pouder coating is very good made and robust against high temperatures and mechanical burdens during the winding with thick wire.

The magnetholding ring.
It solves 2 problems: it helps to glue the magnets with eaqual distances between them and it prevent outcomming of magnets under maximum load conditions.

My magnet covering test.
Coverage is about 80% - the optimum between magnet wight and resulting strongness of magnetic system.
The polarity of magnets is marked by red lines on their ends.
so you only need one look to see, if the are in correct row:line, no line, line,....and so on. The angular boarings into the can bottom looks impressiv, but their real cooling effect is more a psychological.

I used the "powercroco way" to bring the magnets with short parts of copperwire in the absolut correct position.
This part of motorbuilding building is often really underestimated - by correct or uncorrect position of magnets you can win or loose up to 5% in efficiency!!

Last work on the can is gluing in the holding/covering ring.

About the winding.
For the 12slot-14magnatsystem you need a LRK or distributed LRK winding.
I made a distributed LRK winding and connected it in delta.
Imho the best variation tom wind this is this. You have to handle only short wires and no problems with to short layed coil-connections.
Scorpion themself uses 8turns with 15 strands of 0,21mm copperwire.
I prefer the single strand winding.
Calculated scorpion winding is the same as one wire of 0,81mm diameter.
To make it a bit better, I used 0,91mm diameter wire.
The winding was easy made (for my mind). With the shown winding the copperfilling is about 125% of the "original" factory-winding.
Only if you are a really good winder, up to 0,95mm wire is usable for 8 turn winding.

Complete winding.
The connections wires just are in the right position for Delta connetion, the wires which ar eused for ESC connection just are drilled togehter.
Instead of the delivered heat shrink tubes I used a woven typ of insulationtube. why? I like yellow mor ethan black.
Both types are working good.

The connection wire are uninsulated and drilled - ready for soldering them.

All is ready now for the marriage.

The comlete winding.
You can see enough air between the wires especially outside into the slots - place for a thicker wire.
Lefthandside you can see the groove for turning prevention into the statorpackage.

On the statorholder part you cant find the other "half of the hole".
So you have to make it yourself, if you don't want prevent statortorque only by gluing.
The scratches into the surface helps the glue to hold.

These fine milled edges looks nice, but they are a danger for wire insulation. So its imho better to round them during the building.
Also the bearings are placed now into their seats.
You should be attentive that they arn't cant while building them in.
This will damage the seats and cause a lot of additional friction.

The parts ar eglued together.
As torque prevention I have built in a copper wire in right diameter.Der Motor ist aufgestielt und in die Verdrehsicherungsbohrung habe ich erstmal ein Stück Kupferdraht eingeklebt, um mir die Möglichkeit zur geplanten Lageränderung zu erhalten.

View from statorholderplate side on the connection wires.

Ready.
With the very long original shaft the motor weighted 127g.
Btw: I like the laser engraved scorpion logo.
I like too the very low cogging and the smal built airgap of this motor.
2 things, that makes me await very good results into the power test.
Very good too: the perfekt radial run-out .
The efficiency vs. amperage diagramms for 3s and 4s li- battery:
.gif)
and the efficiency vs. power input diagramms:
.gif)
My conclusion:
- Very good result for a motor of this weight.
- It is just on eye-level with the best outrunners on market.
- For the self winders and builder a nice way to get a motor with better data then all sold ready made motors!
- I'am very pleased with the shown performance.
- There are some little things, which could made better from manufacturer side - but nothing formative.